

https://s3.us-west-2.amazonaws.com/media.alliedchemi.com/full/27H1.1
Practical Guidance for Bed Adhesion, Material Compatibility and Stronger Printed Components
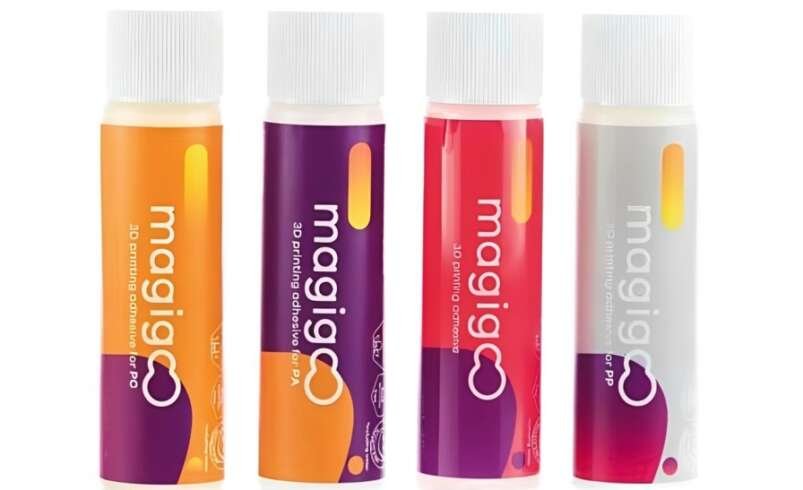
A successful print depends on more than accurate modelling and correct machine settings. Poor first-layer grip can cause lifting, warping or complete build failure, while weak bonds can affect assembled components after printing. Adhesives For 3D Printing provide application-specific solutions for improving build-plate adhesion and joining compatible printed parts.
The correct adhesive must match the printing material, build surface, temperature and intended use. A product suitable for a standard filament may not perform correctly with high-temperature, reinforced or metal-filled materials.
What Roles Can 3D-Printing Adhesives Perform?
Adhesives used in additive manufacturing generally support two different stages:
- Holding the first layer securely on the build plate
- Bonding separate printed pieces during assembly or repair
Bed adhesives are applied to the printing surface before a build begins. They help the first layer remain attached as the material cools and contracts. Assembly adhesives are applied after printing to join components, close seams or attach functional features.
These roles should not be confused. A product designed for temporary build-plate adhesion should not automatically be used as a structural bonding agent. Always follow the product’s stated application and compatibility information.
Why Is First-Layer Adhesion So Important?
The first layer establishes the foundation for every layer that follows. If it loses contact with the build surface, the part may curl at the corners, shift position or detach completely.
Appropriate bed adhesion can help manage:
- Edge lifting
- Warping during cooling
- Layer displacement
- Tall-part instability
- Large flat-surface distortion
- Failed support structures
- Material waste from incomplete builds
Adhesive is only one part of the solution. Bed levelling, nozzle height, surface cleanliness, bed temperature, chamber conditions and material drying must also be controlled. Excessive adhesive can make removal difficult or leave residue on the plate.
How Should Adhesive Selection Match the Printed Material?
Different polymers contract and bond in different ways. PLA may require a relatively simple adhesion approach, while polypropylene, polycarbonate, glass-reinforced blends and high-temperature materials can need a specialised formulation.
The product range includes formats intended for broad filament use as well as materials such as:
- Polypropylene
- Polycarbonate
- Glass-reinforced polypropylene
- Metal-filled filament
- High-temperature engineering polymers
- Other specialised thermoplastics
Material details should be checked before ordering. The available Filaments can vary in diameter, processing temperature, moisture sensitivity and surface behaviour. Selecting an adhesive by brand familiarity alone can produce poor grip or difficult part removal.
What Is a Controlled Bed-Application Method?
A consistent application routine improves repeatability and reduces contamination. Before applying any adhesive, allow the build plate to reach a safe handling condition and remove dust, grease and old residue.
A practical procedure may include:
- Checking that the plate is compatible with the adhesive
- Cleaning and drying the surface
- Applying a thin, even layer
- Avoiding excess material around the print area
- Allowing any specified drying time
- Confirming the bed temperature and nozzle gap
- Observing the first-layer lines closely
- Removing the part only after the plate has cooled when recommended
Pens, glue sticks, sprays and coater bottles offer different levels of coverage and control. A pen may suit small areas or targeted repairs, while a spray or coater may provide more uniform coverage across a larger platform. Ventilation and personal protection should follow the safety information supplied with the product.
How Do Post-Printing Bonding Adhesives Differ?
Printed assemblies often combine multiple pieces, materials or orientations. The adhesive must tolerate the expected load, movement, temperature and environmental exposure.
Cyanoacrylate products may be useful for rapid assembly of small parts. Two-part epoxy systems can provide stronger structural bonds when correct mixing and curing are achieved. Flexible formulations may be better for components that bend or experience vibration, while UV-curable products can offer controlled positioning where the joint is accessible to the curing light.
Before bonding, evaluate:
- Surface cleanliness
- Contact area
- Joint design
- Gap size
- Cure time
- Working temperature
- Chemical exposure
- Expected mechanical stress
- Colour or transparency requirements
Adhesive does not compensate for a poorly designed joint. Increasing overlap, adding locating features or improving surface contact may deliver a greater improvement than simply applying more adhesive.
Can Surface Cleaning Improve Adhesive Performance?
Oil, dust, release agents and old adhesive can prevent proper wetting of the build plate or printed surface. Suitable Cleaning Agents And Equipment For 3D Printing can support preparation when the cleaner is compatible with the plate, polymer and coating.
Cleaning procedures should be validated rather than assumed. A strong solvent may damage a plastic build surface, soften a printed component or leave a film that interferes with bonding. Never mix cleaners, and allow the surface to dry fully before applying fresh adhesive.
How Can Parts Be Held During Bonding and Curing?
Some assemblies require gentle pressure or stable positioning while the adhesive sets. Laboratory support hardware can help organise a temporary fixture when it is suitable for the part geometry and load.
Clamps And Rings can support adjustable laboratory setups, while Bossheads connect rods and apparatus for secure positioning. These products are support components rather than dedicated bonding clamps, so pressure must be applied carefully to avoid deforming the printed part.
For delicate components, use protective pads or a purpose-built jig. Record the orientation, pressure method and cure conditions if the assembly must be reproduced.
Which Supporting Tools Complete the Workflow?
Adhesive application often forms part of a broader preparation and finishing process. Auxiliary Tools For 3D Printing can support surface treatment, finishing and other post-processing tasks.
These tools should be selected according to the printed material and the desired result. A surface coating, sanding method or finishing treatment may change adhesion, dimensions, gloss or chemical resistance. Test the complete sequence on a representative sample before processing a valuable component.
What Should Buyers Check Before Ordering?
A focused purchasing review should confirm:
- Intended use: bed adhesion or part assembly
- Compatible filament or resin
- Build-plate material
- Application format
- Required drying or curing conditions
- Temperature resistance
- Bond strength and flexibility
- Ease of part removal
- Surface-cleaning requirements
- Ventilation and protective equipment
- Storage conditions and shelf life
- Waste-handling instructions
Building a More Reliable Adhesive Strategy
Adhesives For 3D Printing are most effective when they are treated as part of a complete process rather than a cure for every printing problem. Correct material selection, clean surfaces, calibrated first-layer settings and controlled removal all contribute to dependable results.
By matching the adhesive to the substrate and application, then documenting preparation and curing conditions, laboratories, workshops and production teams can reduce failed builds and create stronger, more consistent printed assemblies.