

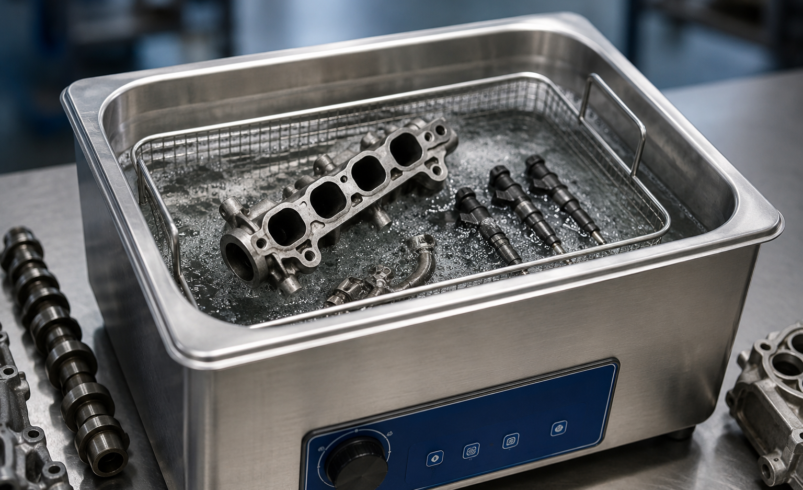

When vehicle parts become covered with soot, oil, carbon, dirt, or other deposits, normal cleaning methods may not always be enough. Some parts have small passages, narrow openings, and areas that are difficult to reach by hand. This is where ultrasonic cleaning can be useful.
A professional ultrasonic cleaning service uses sound waves and a cleaning solution to remove dirt from the surface and hard-to-reach areas of a component. It is often used for automotive parts that need a deep and careful clean.
If you have never used this type of service before, you may wonder what actually happens when you take a part to a professional cleaner. The process is more than simply placing a dirty part into a tank. The part needs to be checked, prepared, cleaned, rinsed, dried, and inspected before it is returned.
Here is what you can expect from a professional ultrasonic cleaning service.
What Is Ultrasonic Cleaning?
Ultrasonic cleaning is a cleaning process that uses high-frequency sound waves in a liquid cleaning solution.
The sound waves create very small bubbles in the liquid. These bubbles quickly form and collapse, creating a cleaning action that can loosen dirt and deposits from the surface of a component.
One of the main benefits is that the cleaning solution can reach areas that are difficult to clean with brushes or other tools.
For automotive parts, this can be helpful when dirt has built up inside small passages, holes, corners, and other hard-to-reach areas.
The exact cleaning process depends on the part, its material, its condition, and the type of contamination that needs to be removed.
Why Choose Professional Ultrasonic Cleaning?
Trying to clean an automotive component at home may seem simple, but some parts need careful handling.
Using the wrong chemical, too much pressure, or an unsuitable cleaning method can damage a component. Some deposits can also be difficult to remove without the right equipment.
A professional service has the equipment and process needed to clean parts more carefully.
The goal is not simply to make the outside of a part look clean. A good cleaning process should also deal with deposits in areas that are difficult to access.
Step 1: The Part Is Inspected
The first stage is usually an inspection.
Before cleaning begins, the technician should look at the part and check its general condition. This can help identify heavy contamination, physical damage, corrosion, cracks, or other problems.
This step is important because cleaning cannot repair a part that is already damaged.
The technician may also check what type of material the component is made from. Different materials can require different cleaning methods and settings.
A professional inspection helps determine whether ultrasonic cleaning is suitable for the component.
Step 2: The Part Is Prepared
The part may need to be prepared before it goes into the ultrasonic cleaning tank.
Loose dirt, large pieces of debris, or excess oil may be removed first. Depending on the component, certain fittings or removable parts may also need to be taken off.
Good preparation allows the ultrasonic cleaning process to work more effectively.
The technician will also make sure the part is positioned correctly in the cleaning tank. This can help the cleaning solution reach the areas that need attention.
Step 3: The Cleaning Solution Is Selected
Ultrasonic cleaning does not rely on sound waves alone.
A suitable cleaning solution is used in the tank. The solution needs to match the type of contamination and the material of the component.
For example, a solution that works well for oily deposits may not be the best choice for another type of dirt.
Using the correct solution is important because a strong or unsuitable chemical can cause damage to certain materials.
This is one reason professional cleaning can be a better option than simply using a household cleaner.
Step 4: The Ultrasonic Cleaning Begins
Once the part has been prepared, it is placed into the ultrasonic cleaning tank.
The ultrasonic equipment sends high-frequency sound waves through the cleaning liquid. These waves create tiny bubbles that form and collapse throughout the solution.
The movement helps loosen deposits from the component.
One useful feature of ultrasonic cleaning is its ability to reach small spaces. A brush may not be able to reach a narrow passage, but the cleaning liquid can move into that area.
The cleaning time can vary. A lightly contaminated part may need less time than a component with heavy oil, soot, or carbon deposits.
Step 5: The Part Is Rinsed
After the cleaning cycle, the part needs to be rinsed.
This removes the cleaning solution and loosened material from the component.
Rinsing is an important part of the process. Leaving cleaning chemicals or loosened dirt behind could affect the part when it is put back into service.
The exact rinsing method depends on the part and the cleaning process used.
Step 6: The Part Is Dried
The component is then dried properly.
Moisture can be a problem for some automotive parts, especially those made from materials that can corrode or contain sensitive areas.
Professional drying helps remove remaining water from the component, including water that may have collected in small openings or passages.
The part should be completely dry before it is inspected and returned for use.
Step 7: Final Inspection
After cleaning and drying, the component can be inspected again.
The technician can compare its condition with how it looked before cleaning. The aim is to make sure deposits have been removed as effectively as possible and that the part has not suffered damage during the process.
This inspection can also reveal problems that may have been hidden under layers of dirt or carbon.
It is important to remember that cleaning and repair are two different things. If a component has worn, broken, or damaged parts, cleaning will not restore those parts.
What Can Ultrasonic Cleaning Remove?
Ultrasonic cleaning can be effective against many types of contamination. The result depends on the type of deposit, how heavy it is, and the component being cleaned.
| Type of Contamination | What Ultrasonic Cleaning May Help Remove |
| Oil and grease | Loosens oily deposits from surfaces and small areas |
| Soot | Can help remove soot from contaminated components |
| Carbon deposits | May loosen certain carbon deposits |
| Dirt and grime | Helps remove general dirt from difficult areas |
| Residue | Can clean residue from small passages and surfaces |
| Fine debris | Helps remove small particles from hard-to-reach areas |
Not every deposit can be removed completely, and some components may need another cleaning method or further work.
How Long Does Ultrasonic Cleaning Take?
There is no single cleaning time for every part.
The time can depend on the size of the component, the material, the type of contamination, and how heavily the part is soiled.
A part with light dirt may need a shorter cleaning cycle, while one with thick deposits may need more attention.
A professional cleaner should inspect the component before giving you an idea of the cleaning process and expected turnaround time.
Can Ultrasonic Cleaning Damage Parts?
When the correct equipment, cleaning solution, temperature, and settings are used, ultrasonic cleaning can be a safe way to clean many suitable components.
However, not every material or part is suitable for the same process.
This is why professional assessment matters. The cleaning method should be chosen based on the component rather than using the same settings for everything.
It is also important to understand that ultrasonic cleaning is not a magic solution. If a part has serious mechanical damage, cleaning will not make it new again.
Benefits of Professional Ultrasonic Cleaning
One of the biggest advantages is the ability to clean areas that are difficult to reach manually.
It can also provide a more even cleaning action across complex surfaces. This can be useful for parts with small holes, passages, corners, and detailed internal areas.
Another benefit is that professional equipment gives technicians better control over the cleaning process.
A proper cleaning service can also save time compared with trying different brushes, chemicals, and methods yourself.
For vehicle owners, the main benefit is having a component cleaned using a method selected for its condition and material.
What Should You Do After Cleaning?
Once the part has been cleaned, it should be handled and installed according to the manufacturer’s requirements.
If the component is part of a larger vehicle system, other related components may also need to be checked.
For example, if a part became heavily contaminated because of an underlying engine or emissions problem, cleaning only that part may not prevent the contamination from returning.
Finding the reason for the build-up is therefore just as important as cleaning the part.
Conclusion
A professional ultrasonic cleaning service is a careful process that involves much more than putting a dirty component into a cleaning tank. Inspection, preparation, the right cleaning solution, ultrasonic cleaning, rinsing, drying, and final inspection all play an important role.
The process can be especially useful for automotive components with oil, soot, carbon, dirt, and deposits in hard-to-reach areas. However, cleaning should always be matched to the condition and material of the part.
If you are looking for a professional service for your vehicle components, Ultrasonic Cleaning Melbourne can provide a practical way to give suitable parts a deeper clean and help them return to service in better condition.
Frequently Asked Questions
1. Is ultrasonic cleaning suitable for all automotive parts?
No. Some materials and components may not be suitable for ultrasonic cleaning. A professional inspection should be completed before the process begins.
2. Does ultrasonic cleaning remove carbon deposits?
It can help loosen and remove certain carbon deposits. The result depends on how heavy the deposits are and the type of component being cleaned.
3. Is ultrasonic cleaning better than manual cleaning?
It can be more effective for parts with small passages and difficult-to-reach areas. However, the best method depends on the component and the type of contamination.
4. How long does ultrasonic cleaning take?
Cleaning time varies from one part to another. Heavy contamination may require a longer cleaning process than light dirt or residue.
5. Can ultrasonic cleaning repair a damaged part?
No. Ultrasonic cleaning removes contamination but does not repair broken, worn, cracked, or mechanically damaged components.
6. Does the part need to be dried after ultrasonic cleaning?
Yes. Proper drying helps remove moisture from the component and reduces the risk of problems caused by leftover water or cleaning solution.
7. Should a part be inspected after cleaning?
Yes. A final inspection helps confirm the cleaning result and may also reveal damage that was hidden by dirt or deposits.